Sunday, October 24, 2010

What I did at the crop!

Even though my weekend had to be cut short, I'm happy with what I managed to actually accomplish this year!


That's all for now folks! :)

Wednesday, October 20, 2010

Lace flower tutorial

Welcome to Scrappy Hour! I hope you like the fun but beautiful (and sometimes stunning IMO) project I have for you tonight. I'll be here for a little while but you know me, early to bed! I will however be around tomorrow to answer any questions you may have.

I'd like to show you how to make a lovely lace flower.  I love to use flowers and love an old fashioned look and feel. Lace flowers are some of my favourites. I can't always afford a Prima - nor do I always have the perfect one "on hand". As you know, I adore fabric and all things textile so making these was a natural progression for me. To make these beauties, follow these easy steps:

Materials:
lace
wire
center object

1.  pick your lace. Decide on your center look. As a general rule, I like to use lace that is about 1" in width. Depending on what you want to center in your lace however determines how wide your lace needs to be, the bigger the center (and the final dimension of the flower) the wider the lace. The smaller? The reverse is true.


I also like if possible to use wire for this project (this project is also easily done with needle and thread instead of wire). Wire is just firmer and helps me with my spazzy (MS) hands to work easier! Here I've chosen a butterfly (I love using butterflies on my pages!) to work with. You can also use twist ties or other florist type wire. You won't see it when you're done. My lace is also smaller in the demonstration photos than I normall work with because I wanted some small flowers for my project. It's 3/4" wide.

How much lace? As a general rule of thumb, use double the length of the wire that you're going to use.

2.  Starting at one end, thread your wire (or needle and thread) through every other (or so - this is not an exact science) loop in the top of one side of your lace. Do this until you have approximately double the length of lace compared to the length of wire - or until it looks good TO YOU. This project is all about what YOU like. Smiley


3.  One thing I find helpful is to curl my wire as I go to make sure the gathers in the lace are the fullness I'm wanting to see. If it's not right, I can remove some or keep going. Again, this is a personal choice.


4.  When you've reached about as far as you want to go and the gathered lace is as full as you'd like it to be, cut the remaining lace.


5. Now comes the "fun" part. Just take the loose end of the wire so the two ends are twisted together Et voila! Just press and crinkle and shape to your liking and you're done!


Now, I didn't end up liking that green butterfly on the size of lace I chose so replaced it with the antique button you see on the flower below. Each one of these beauties took me under 5 minutes to make (longer if you have to stop and take photos along the way Wink ) and you'll be seeing them on layouts of mine in the near future.


I hope you've enjoyed our time together. Let me know if you have any questions! I look forward to seeing what you do with this project and seeing some lacey flowers on your layout or cards in the near future!     Kiss

Sunday, October 17, 2010

Scrap~tures is the Weekly Sponsor at Creative Scrappers!


This week on http://www.creativescrappers.blogspot.com/ Scrap~tures is the sponsor of the week! Please check out how you can win a Scrap~tures kit!!!
 
I chose to celebrate by using the milestone 125 sketch. Although I didn't enter it for the reveal, I certainly enjoyed working with it.

Friday, October 15, 2010

Fabulous Friday Sketch Challenge for Scrap~tures!

This week's sketch is once again courtesy of Creative Scrappers Why not give it a try and toss your name in the hat for prizes over at Scrap~tures this month! Lots of ways to win. Check out this link to see what the very generous Denise has up her sleeve for you all!

Let me know what you think of what I did with this sketch. I'd love your feedback!


Wednesday, October 13, 2010

My Scraptures October kit reveal

We got to work with the yummy SEI Moonrise papers this month. I hope you enjoy what you see and pop over to Scrap~tures to get in on one of the few remaining kits!


Scrap~tures October Scrapbook Kit~S.E.I Moonrise
                                                              1 sheet of S.E.I  Moonrise Serenity
1 sheet of S.E.I Moonrise Stillness
1 sheet of S.E.I Moonrise Quiescent
1 sheet of S.E.I Moonrise Composure
1 sheet of S.E.I Moonrise Opulence
1 sheet of S.E.I Moonrise Enchantment
1 12x12 sheet of Bazzill Chedar
1 12x12 sheet of Bazzill Sherbet
1 12x12 sheet of Bazzill Capers
1 sheet of S.E.I Moonrise Bark textured cardstock
1 pk of S.E.I Moonrise Alphabet stickers
1 pk. of S.E.I Moonrise cardstock stickers
½ pk. of S.E.I. Moonrise die-cut accents
1 Prima Say It In Pearls Light Brown Flowers
1 Prima Tiger Eyes Love Letter Roses
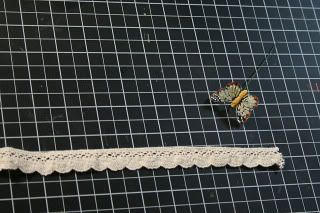
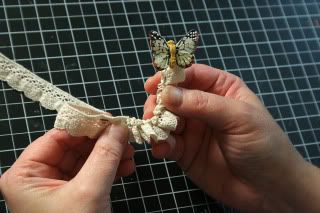
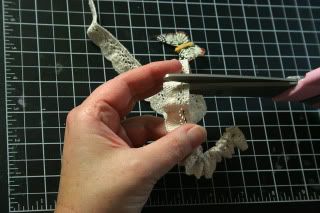
1 yd. of Prima Vintage Crochet Trim
                                                                      Your deluxe add-ons include~
1 pk. S.E.I Moonrise Metal Accents
1 pk. Clearsnap Leaf Noiveau Design Adhesive
1 Martha Stewart Glass Luster Micro beads


Created with the October Card Kit contents:


                       Scrap~tures October Card Kit ~ Unity Stamp Company Fall Splendor
                                  1 Unity Stamp Company Fall Splendor Foam Cling Stamp Set
1 sheet of Little Yellow Bicycle Autumn Bliss Blue Sky & Leaves
1 sheet of LYB Autumn Bliss Bronze Leaves
1 sheet of LYB Autumn Bliss Brown Leaves
1 sheet of LYB Autumn Bliss Multi Plaid
1 12x12 sheet of Bazzill Barclay
1 12x12 sheet of Bazzill Pinecone
1 12x12 sheet of Bazzill Buttercup
1 12x12 sheet of Bazzill Hillary
1 Prima Brown Sweet Taffy flowers
½ pk. LYB Autumn Bliss brads
1 Maya Road ink
1 Ranger Copper Perfect Pearls
5 Bazzill A-2 French Vanilla Envelopes
2 yds. Prima Lace


Remember to pop on over to Scraptures to get your hands on these fast-selling kits!

Happy Scrapping!

Friday, October 8, 2010

Finally Friday at Scraptures!

This week's finally Friday sketch is brought to you courtesy of Creative Scrappers sketch #111


And here's my take on it. Let's see what you can do!


Leave me a comment and tell me what you think!

Friday, October 1, 2010

October 1 is challenge kick off day at Scraptures!


Finally Friday October 1 sketch challenge from Sketch #123 at Creative Scrappers


My October 1 challenge - LAYERS - let's see them!


Don't forget to check out the Scraptures blog for more fun!